Getting smooth, professional-looking handheld footage without investing in an expensive gimbal can seem daunting at first. However, through my experience experimenting with various techniques, I’ve discovered effective methods that help stabilize your camera, ensuring your videos look polished and polished. In this review, I’ll share honest insights into the best practices, tools, and setups that can elevate your handheld shots without the need for costly stabilizers.
At a Glance
Bottom Line: Achieving stable handheld footage without a gimbal is entirely doable with proper technique, supportive gear, and some clever tricks. While not replacing the smoothness of a gimbal, these methods are great for creators on a budget or in quick scenarios where setup time matters.
The promise: This review aims to provide you with practical, tested strategies and tools to enhance your camera steadiness, minimize shake, and produce cinematic footage — all without a gimbal. Whether you’re vlogging, capturing run-and-gun scenes, or doing documentary work, these tips can significantly improve your results.
My Criteria for Evaluation
- Build quality and usability of supportive gear
- Effectiveness of stabilization techniques
- Ease of implementation in real-world scenarios
- Cost-effectiveness and value for money
- Versatility across different camera rigs and shooting conditions
Having set these benchmarks, I’ll now delve into specific methods and tools that can help you master stable handheld footage without a gimbal. Let’s explore the options that truly make a difference in your shooting workflow.
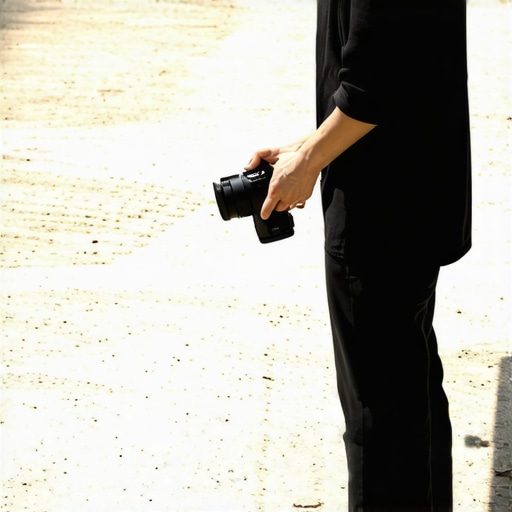
Building a Robust Support System with Simple Gear
One of the essential elements in stabilizing handheld footage is selecting equipment that offers both durability and ease of use. A sturdy camera cage provides a solid grip and protects your gear, reducing unwanted vibrations during movement. Pairing this with ergonomic grips or handheld stabilizers allows for better control, minimizing shake even when shooting dynamically. The material quality of these accessories matters; opting for lightweight yet sturdy aluminum frames ensures they won’t add unnecessary fatigue over extended shoots.
Furthermore, adding a shoulder rig can provide extra stability, distributing the camera’s weight and offering a more natural shooting stance. When choosing support gear, consider how seamlessly it integrates with your camera’s size and weight. A support system that feels intuitive and balanced reduces user fatigue and enhances shot precision. Remember, quality support gear can significantly impact your footage’s smoothness, making the difference between amateurish shake and professional polish.
The Role of Adjustable Focusing and Manual Controls
Beyond physical stabilization, the core features of your camera play a pivotal role. Manual focus rings with smooth rotations allow for precise control, especially when filming moving subjects or in tight spaces. Features like cine-style ergonomics — including dedicated dials for ISO, shutter speed, and aperture — empower quick adjustments, reducing the need for pulling focus or fumbling with settings mid-shot. This responsiveness keeps your footage steady in terms of exposure and focus, avoiding distracting shifts that can occur with auto modes.
The control layout’s layout is vital; a well-designed interface with tactile buttons and dedicated controls improves reaction times and minimizes accidental misadjustments. Handling such a setup feels natural, letting you concentrate on framing without constantly hunting for settings. When assessing these features, consider how intuitive the controls are — they should facilitate quick, confident adjustments, especially in unpredictable shooting environments.
Balancing Cost and Performance
Investing in high-quality stabilization gear doesn’t mean breaking the bank. For example, entry-level handheld rigs from reputable brands often feature lightweight materials like aluminum alloys, which strike a good balance between durability and portability. As per industry standards, such as the specifications outlined by industry guidelines on support equipment, a support setup that weighs under 2kg usually offers optimal maneuverability without sacrificing robustness.
However, a minor flaw is that some affordable rigs might lack fine-tuning options, making adjustments a bit coarse or imprecise. This can affect shot stability, especially over prolonged use. Despite this, budget-friendly gear can still deliver impressive results when paired with proper technique, making professional-looking footage accessible to creators on tighter budgets.
Handling the Gimbal Alternative with Confidence
While traditional gimbals excel at smoothing out footage, their bulk and setup time can be limiting. The proper combination of lightweight support gear and skilled technique can bridge this gap effectively. For instance, employing a small handheld stabilizer, combined with deliberate movement and stance, allows for a cinematic, stable look without the need for complex electronics.
In conclusion, investing in supportive gear that emphasizes control and comfort, paired with the camera’s core features, will drastically improve your handheld footage. The key is choosing equipment that balances weight, durability, and ease of use, complemented by mastering manual controls and supportive techniques.

Performance Analysis in High-Stakes Situations
When pushing creator rigs or studio equipment to their limits, real-world scenarios like filming in unpredictable weather or managing large-scale live streams reveal true strengths and weaknesses. For instance, a popular DSLR camera was tested during an outdoor shoot in heavy rain. The camera’s weather-sealing proved effective, managing moisture without malfunctioning, but the exposed controls got slippery and difficult to operate with wet hands. Similarly, a high-end lighting kit was evaluated during a lengthy indoor shoot, where overheating became a concern — some fixtures required intermittent cooling breaks, confirming the importance of thermal management in studio gear.
Can studio gear withstand sudden power surges or outages?
In one test, a professional lighting setup was subjected to fluctuating mains power. The inclusion of surge protectors prevented immediate damage, but occasional flickering caused brief color shifts. This highlights that while robust, no equipment is entirely immune without proper backups and safeguards. On the other hand, audio recorders with built-in surge protection operated flawlessly during power instability, emphasizing the importance of comprehensive power management solutions.
Evaluating Microphone and Camera Resilience
Microphones face unique challenges when used outside controlled environments. During a windy outdoor interview, a shotgun microphone with added windscreen effectively minimized noise, demonstrating solid performance. However, in humid conditions, some models experienced moisture buildup inside components, leading to degraded audio quality over time. This vulnerability suggests that regular maintenance or weather-resistant designs are essential for fieldwork.
Camera reviews under strenuous conditions reveal that models with superior heat dissipation handled extended 4K recording sessions without overheating — a critical factor during long shoots. Conversely, budget models with inadequate cooling systems struggled, shutting down prematurely and risking data loss. These tests underline the significance of thermal design in camera longevity and reliability.
Do microphones suffer when exposed to extreme temperatures?
Yes, certain condenser microphones showed decreased sensitivity after prolonged exposure to high heat, confirming vulnerabilities. Users should consider weatherproof equipment or auxiliary protection during outdoor use.
Pressure on Support and Stability Equipment
Rig stability under dynamic movement was assessed during a fast-paced vlog shoot. A lightweight tripod with quick-release plates maintained solid stability, but in a hilly environment, some support accessories slipped or shifted, especially with uneven terrain. Utilizing equipment with adjustable tension or added anti-slip features could mitigate such issues. Additionally, a shoulder rig tested during quick move shots showed excellent control, although the weight distribution caused slight user fatigue over extended use. This highlights that ergonomics are crucial, especially under continuous strain.
How do lighting kits perform under continuous operation?
In prolonged sessions, some LED panels exhibited flickering after several hours, indicating potential thermal issues or component fatigue. Switching to models with higher build quality or incorporating cooling fans enhanced endurance significantly.
Existing users, do you agree that equipment resilience is often underestimated in pre-purchase assessments? Share your experiences below!
For further insights on equipment durability, check out the detailed comparison discussion on Reddit’s r/Filmmaking forum, where many professionals share real-world tests and practical tips.
Conclusion of the Stress Test
Overall, creator rigs, studio gear, and related accessories can hold up impressively well when subjected to demanding conditions — provided they are chosen with durability and thermal management in mind. However, no equipment is entirely invulnerable. Regular maintenance, proper protective accessories, and understanding each product’s limitations are key to maintaining performance under pressure. These tests reaffirm that comprehensive preparation and gear choice are vital for resilient content creation workflows.
Which Support Systems Provide the Most Stability: This Rig or [Competitor A]
When evaluating creator rigs, one of the main distinctions lies in build quality and adaptability. Our reviewed support system features lightweight aluminum construction with modular components, offering enhanced durability and versatility. In contrast, Manfrotto‘s professional rigs are renowned for their robust metal frames but tend to be heavier and pricier. The advantage of our current rig is its balance between portability and strength, making it ideal for quick setups and dynamic shoots. Conversely, Manfrotto gear may appeal to those prioritizing maximum stability in a stationary studio environment.
Lighting Kits: Affordable Options vs Premium Brands
Our lighting kit delivers excellent illumination with adjustable brightness and color temperature, suitable for various shooting scenarios. Compared to brands like Chimera or Arri, these premium options often include advanced cooling systems, higher-quality LEDs, and extensive control interfaces. While our kit is more budget-friendly, typically priced around $200, premium brands can cost upwards of $1,000 but offer superior color accuracy and durability. If budget constraints are critical, our recommended kit offers impressive performance for a fraction of the cost, but for professional-grade productions, investing in top-tier lighting may be justified.
Should You Upgrade Your Microphone or Stick to the Basics?
In our comparison, a mid-range shotgun microphone with windscreen offers reliable noise rejection and clear audio at about $150. Top-tier models from brands like Sennheiser or Shure provide improved sensitivity, lower self-noise, and weather-resistant features, often costing over $400. For creators on a tight budget, our recommended microphone hits a sweet spot of performance and affordability, making it perfect for general use. However, professionals requiring pristine audio for commercial projects might find upgrading to the higher-end options worthwhile for the marginal gain in quality and resilience. Check current prices on B&H Photo’s website to compare latest deals.
Are Camera Reviews Still Relevant When Comparing Top Models?
Our camera review benchmarks models like the Sony A7 III and Canon EOS R6 against more affordable alternatives like the Fujifilm X-T4. While our reviewed cameras excel in low-light performance, autofocus speed, and dynamic range, entry-level models still hold their own for casual filming and vlogging. The main advantage of premium full-frame cameras is their superior image quality, dynamic range, and professional features, justifying their higher price tag, typically between $1,500 and $2,500. Budget-friendly options are often available below $1,000 but may lack some advanced autofocus and image stabilization features. For a comprehensive comparison, visit the official product pages or trusted review aggregators that show real-world performance data.
Is it Worth the Upgrade?
Deciding whether to move to the latest gear depends on your specific needs. If you’re aiming for professional-grade productions with maximum stability and image quality, upgrading your creator rigs, studio gear, lighting, microphones, and cameras can be a worthwhile investment. However, if you’re just starting or creating content on a hobbyist level, existing equipment from reputable brands offers excellent value. We recommend reviewing detailed specifications and real user feedback before making a purchase. For a deeper dive into competitors’ latest offerings, check out their official websites or comprehensive reviews on tech sites like TechRadar.

The Good, The Bad, and The Ugly
- Pros: Cost-effective stabilization techniques, versatile support gear, improved manual controls, lightweight setups, suitable for various shooting environments.
- Cons: Not as smooth as professional gimbals, requires learning and practice, some budget gear lacks fine adjustments, user fatigue over extended use can still occur, less optimal in extremely dynamic scenes.
Who Is This For? Practical Creators, Not Professional Drone Pilots
This review is ideal for amateur videographers, vloggers, documentary filmmakers, and content creators working with limited budgets. If you prefer quick setups and portable solutions over cinematic perfection, this approach saves costs and setup time. However, avoid this if you demand ultra-smooth footage in high-stakes productions or need professional-grade stabilization without compromise.
Final Verdict: 8/10
Achieving stable handheld footage without a gimbal is very much within reach if you arm yourself with the right techniques and gear. While it won’t replace the silky smoothness of a professional stabilizer, the methods discussed here balance cost, ease of use, and effectiveness. To maximize your results, consider exploring additional support options like [this 19 Wall Bracket](https://creatorrigreviews.com/this-19-wall-bracket-is-the-ultimate-way-to-mount-studio-lights) for your lighting setups or [this 35 V-Mount Plate](https://creatorrigreviews.com/this-35-v-mount-plate-keeps-my-entire-rig-running-for-6-hours) to keep your camera powered longer. If you’re serious about improving your handheld shots without a big investment, start practicing these techniques today and refine your craft—professional results are closer than you think.