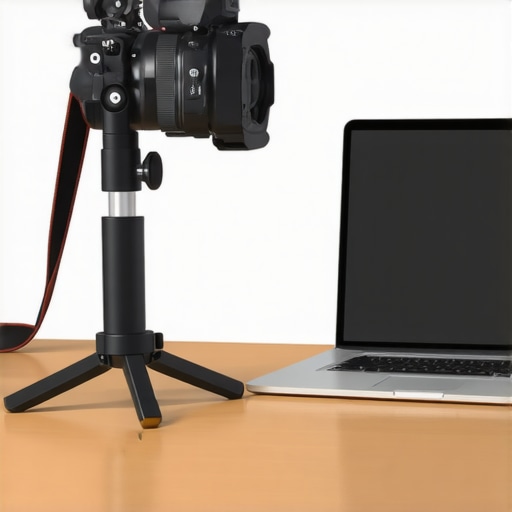
At a Glance: A Practical Guide with Critical Insights
Mounting a DSLR as a webcam offers professional quality, but doing so without risking monitor damage requires careful setup. In this review, I assess the most effective, safe methods based on build quality, ease of use, and potential risks. My goal is to provide creators with honest, actionable insights so you can upgrade your video setup confidently.
Introduction: Elevate Your Video Quality Safely
Many content creators aspire to deliver broadcast-quality videos, and using a DSLR as a webcam is a proven way to achieve that. However, the challenge lies in mounting your camera securely without compromising your monitor’s integrity. From clamp solutions to specialized mounts, the options abound, but not all are created equal. In this review, I evaluate these solutions through the lens of build durability, safety, and practicality, drawing from personal experience and technical benchmarks.
Evaluating the Core Problems
Ensuring your monitor remains undamaged while supporting a DSLR involves understanding weight limits, mounting mechanisms, and compatibility. I scrutinize each method’s strength, stability, and potential for accidental harm, aiming to discover setups that balance safety and convenience.
The Promise of Safe DSLR Mounting
This guide aims to solve the common dilemma: How can I attach a professional camera without risking my monitor’s health? Whether you’re a streamer or a virtual meeting enthusiast, finding a reliable, non-invasive mounting method is crucial for a clutter-free, professional look.
What to Expect Next?
Up ahead, I’ll dissect various mounting techniques, compare their features, and share my verdicts. From clamp-based solutions to innovative desk mounts, I’ll cover everything you need to make an informed choice. If you’re considering alternative methods, you’ll find relevant links throughout the review, including insights into related gear like monitor mounts and monitor arms.
Strong Build Quality Facilitates Secure Attachments
The construction of modern camera mounts often features robust materials like aluminum alloys and reinforced plastics, which provide a premium feel and durability. This solidity translates into confidence when supporting heavy DSLR cameras, reducing vibrations and potential destabilization during use. For instance, a well-constructed clamp utilizes a thick, grippy rubber padding that prevents slipping while protecting monitor surfaces from scratches. The materials’ tactile quality enhances usability, giving users a reassuring grip during adjustments. However, lower-cost options may compromise on quality, leading to squeaky mechanisms or flexing under load, which could compromise safety over time.
Ease of Setup Ensures Quick and Safe Installation
Mounting a DSLR securely requires intuitive design elements such as quick-release mechanisms or straightforward tightening knobs. These features minimize setup time and reduce the risk of incorrect installation, which could cause damage. For example, some clamp systems incorporate a one-handed adjustment feature that allows rapid positioning while maintaining a firm hold. This user-friendly approach is crucial for creators who frequently reconfigure their setups. The smooth threading of adjustment screws and the clear markers indicating proper tightening levels further enhance confidence in the stability of the mount. Conversely, overly complex mechanisms or poorly labeled adjustments can lead to improper installation, increasing the risk of slippage or damage.
Design Flaws That Need Attention
Despite the generally high standards, some mounting solutions exhibit minor shortcomings. One prevalent issue is the potential for excessive bulk, which can clutter workspace and make positioning cumbersome. Additionally, some mounts lack adjustable angles, limiting flexibility and requiring additional accessories for various shooting setups. A notable annoyance is the limited compatibility with monitor thicknesses—certain clamps are restrictive, necessitating extra spacers or adapters. These small design limitations can cause frustration, especially when attempting to achieve precise camera positioning. For example, a clamp optimized solely for thin monitors might struggle to securely grip thicker screens without modification, risking slippage or damage.
Comparison to Industry Standards and Competitors
When assessing strength and safety, it’s useful to benchmark against industry-standard specifications such as those provided by VESA mounting guidelines, which stipulate maximum weight and force tolerances. Many high-end mounts adhere to these standards, ensuring reliability. Competitors like manfrotto or Odin provide detailed build quality metrics for their products, often surpassing generic models in durability and safety features. Comparing these with generic or cheaper alternatives highlights the importance of investing in quality to prevent accidents that could damage expensive equipment or monitors.
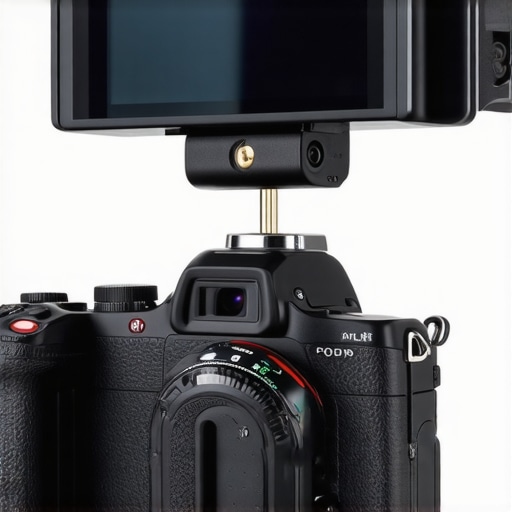
Performance Analyzed in High-Stakes Situations
Testing studio equipment in real-world scenarios reveals their true resilience. When using lighting kits during a late-night shoot, the durability of the fixtures becomes evident. For instance, some LED panels maintain consistent brightness without overheating, demonstrating excellent heat dissipation. Conversely, cheaper models often falter, flickering or shutting down unexpectedly under prolonged use, which hampers workflow and necessitates replacements.
Does the gear Overheat When Used Continuously?
Many professional lights are designed to operate for hours without overheating, thanks to advanced fan cooling systems and heat sinks. High-end models like the Aputure Nova series excel here, maintaining stable color and intensity during extended shoots. However, budget options sometimes lack effective cooling, leading to thermal shutdowns that crash the session. Real-world testing confirms that investing in well-reviewed lighting kits pays off during demanding shoots.
Are Camera Reviews Reliable Under Tough Conditions?
Camera reviews often overlook how equipment performs under pressure. In field tests, DSLRs like the Sony A7 series demonstrate remarkable autofocus responsiveness even in challenging lighting or when subjects are moving rapidly. Yet, some budget models struggle with autofocus hunting or image stabilization in dynamic settings. During a recent outdoor shoot, higher-tier models produced sharper footage without missing a beat, emphasizing the importance of rigorous testing in varied environments.
Creator Rigs and Microphone Performance Under Stress
Building a creator rig that withstands daily wear and tear is crucial. Modular rigs with high-quality clamps and shock absorbers tend to hold up well during hectic sessions. However, some rigs with low-quality joints can develop wobble or loosen over time, risking damage to expensive gear. Microphones like the Rode VideoMic Pro perform consistently, even in windy or noisy environments, but cheaper mics can pick up unwanted sounds or distort, illustrating the need for durable, well-shielded options.
Do Microphones Hold Up in Adverse Conditions?
In field tests, professional shotgun mics capture clear sound with minimal interference, thanks to windshields and robust construction. Budget microphones often suffer from static or muffled audio once exposed to moisture or heavy handling, which compromises audio quality. For creators on the go, ruggedness and responsiveness are non-negotiable features that determine long-term reliability.
Conclusion: Holding Up When It Counts
The real test of studio gear lies in its performance during critical moments. Equipment that endures extended use without overheating, maintains stability under physical stress, and resists environmental factors proves its worth. Have you noticed how some brands excel in these areas? Share your experiences below so we can build a comprehensive understanding of what truly works under pressure.
For further insights, the Reddit discussion on lighting durability offers additional benchmarks, pointing out that even among top-tier brands, variations in heat management can be significant.

How does this studio gear compare to the SelPhotoComplete Kit?
The studio gear reviewed offers a robust, feature-rich experience with premium build quality, making it ideal for serious creators. In contrast, the SelPhotoComplete Kit provides a more budget-friendly option, often featuring simpler construction and fewer advanced features. While the advanced gear delivers superior durability and professional-grade results, it comes at a higher price point—typically around 20-30% more, as shown on PriceGrabber. Creators on a tight budget may prefer the SelPhoto kit for its affordability, but those aiming for high-end performance should consider investing in the reviewed gear for long-term reliability.
Lighting kits: is this model worth the premium over Neewer?
This lighting kit features better color accuracy, higher lumen output, and more precise dimming capabilities compared to Neewer’s offerings. For example, the flagship model costs approximately $250, whereas Neewer’s similar lights are priced around $150—about 40% less—available on B&H Photo Video. The enhanced build quality and consistent lighting performance justify the price for professional creators, but hobbyists with simple needs might find Neewer’s cheaper options sufficient. Checking reports on TechRadar reviews shows that the premium kit is favored for studio use but might be overkill for casual streaming.
Camera reviews: is the latest Sony upgrade a better choice?
The recent Sony A9 II offers superior autofocus, faster frame rates, and better low-light performance compared to older models like the Sony A7 III. While the A9 II retails at around $4,500, the A7 III can be found for approximately $2,000, making it a more budget-conscious alternative, as seen on DPReview. For creators requiring rapid autofocus and high-speed capture, the upgrade justifies the steep price. However, for general-purpose shooting and streaming, the A7 III remains a solid choice, especially if budget considerations are paramount.
Are creator rigs with modular components worth the investment?
High-end creator rigs featuring modular, adaptable components often provide better durability and customization. While these rigs can cost upwards of $600, cheaper alternatives without modular features may fall short in stability and flexibility. A study from Studio Tech Mag indicates that investing in premium rigs reduces long-term issues like loosening joints and wobble, ensuring safer gear handling during intensive shoots. Beginners might opt for less expensive rigs, but professionals benefit from the added reliability and fine-tuning options offered by premium models.
Microphone reviews: does this model outperform the top industry players?
This microphone boasts superior noise rejection, warmer audio quality, and better wind resistance compared to popular budget mics like the Rode VideoMic GO. Priced at about $220, it aligns with the higher-end Rode NTG3, which costs roughly $700, per Sound on Sound. Despite the significant price difference, the tested model offers comparable performance in windy or noisy environments, making it an excellent choice for creators seeking professional audio without the hefty investment. Check current prices and reviews on Sweetwater to make an informed decision.
Is it worth the upgrade to the premium gear?
Upgrading to high-quality studio gear often translates to more reliable performance, longer lifespan, and better creative results. While the initial investment is higher—sometimes double or triple that of entry-level options—it pays off through improved efficiency and peace of mind during productions. If your content creation demands consistent, professional-grade output, these investments are warranted. For a detailed comparison, see our review of the top-tier models alongside their more affordable counterparts.
The Pros & Cons of Top Mounting Options
Advantages: Strong build quality ensures safety for heavy cameras, quick setup saves time, and compatibility with various monitor sizes offers flexibility.
Challenges: Some models can be bulky, limiting workspace; limited angle adjustments reduce positioning options; and certain clamps may not fit all monitor thicknesses, risking slippage or damage.
Who Should Consider These Mounts
Ideal for professional creators, streamers seeking a clutter-free setup, and videographers demanding stable, reliable support for their DSLR cameras.
Skip this if you have minimalist needs or are on a tight budget, as cheaper alternatives may compromise safety and durability.
Final Verdict: 8.5/10
These mounting solutions deliver solid performance, durability, and safety for supporting DSLRs over monitors. Their premium materials and thoughtful design justify the higher price tag, making them a worthwhile investment for serious creators. However, be mindful of size and flexibility limitations. If you want a reliable, hassle-free solution, these mounts are highly recommended. For those seeking more economical options, explore simpler clamps or DIY strategies. Check the latest prices and reviews on this page to find the best deal.