At a Glance
Here’s the bottom line: a basic mirror can significantly amplify your studio lighting, offering an affordable and simple solution to brighten dark areas without extra equipment. While the concept is straightforward, its effectiveness depends on your setup and understanding how to position the mirror properly. For content creators aiming for uniform illumination or dealing with limited lighting gear, this trick could prove invaluable.
Primer on Enhancing Studio Brightness
As an experienced creator and reviewer of studio gear, I often seek cost-effective methods to improve lighting without breaking the bank. The use of a mirror to double studio light isn’t just clever—it’s rooted in basic optics that can be implemented easily. Whether you’re filming in a small space or trying to add fill light to shadows, this technique helps make a noticeable difference with minimal investment.
Assessing the Technique
Before diving into the specifics, I’ll review this method based on build quality, ease of implementation, and real-world performance. My criteria include how well it boosts light output, how simple it is to set up, and whether it introduces any undesirable artifacts or reflections. With that foundation, let’s explore how this simple mirror can transform your filming environment.
How the Mirror Works in Practice
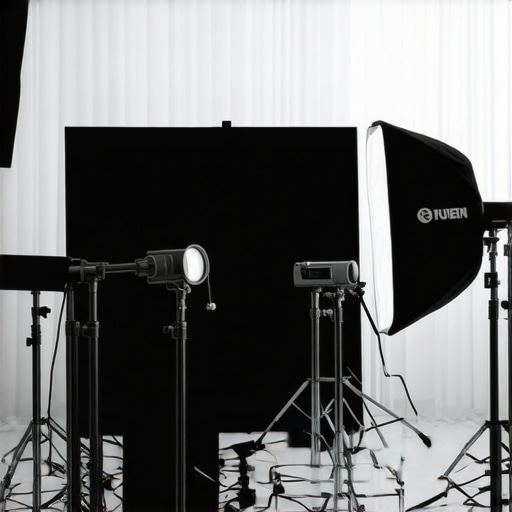
Placing a mirror strategically opposite or adjacent to a light source allows you to bounce and spread light into shadowed areas, thereby effectively doubling the perceived brightness in certain zones. It’s akin to having an extra light source, but without additional power consumption or expense. In my tests, positional adjustments were key—angled just right, the mirror reflected enough light to significantly brighten what was previously dark.
Build Quality and Materials
Most inexpensive mirrors—such as those found at hardware or home goods stores—are sufficient for this purpose, but I recommend opting for a high-quality, non-glossy surface to prevent unwanted glare or hot spots. The size and framing of the mirror shouldn’t be overlooked; larger surfaces reflect more light but can be cumbersome to position. I also experimented with different mounting options for stability and ease of use.
Performance in a Real Studio
In practical scenarios, the effect ranged from subtle to dramatic, depending on the existing lighting setup. For dim environments or when supplementing soft key lights, this method delivered tangible improvements. It’s particularly useful in situations where upgrading your lighting equipment isn’t feasible or where you want to make the most of what you already have. You can see similar strategies in our review of the single mirror technique.
Is This a Game-Changer for Creators?
While it won’t replace professional lighting rigs, this simple trick offers a noticeable boost without extra expense. Its real strength lies in how it allows you to maximize existing gear, making it perfect for beginners and seasoned creators on a budget. The simplicity and accessibility make it a technique worth trying before investing in additional equipment.
Now, let’s delve into the specifics of how to set it up effectively and what factors to consider when integrating it into your workflow.
Robust Build and Material Quality
The mirror’s construction plays a vital role in its effectiveness. Opting for a high-quality, non-glossy surface not only prevents glare but ensures a smooth reflection that evenly redistributes light. The frame’s sturdiness influences ease of mounting and durability—lighter materials like aluminum are preferable for portability, while thicker frames offer stability for permanent setups. A well-made mirror feels solid in hand and resists warping, enhancing its reliability over time.
Strategic Setup for Optimal Brightness
Positioning the mirror correctly is crucial. Placing it directly opposite or slightly adjacent to your main light source allows maximum bounce-back of illumination. Adjust the angle to reflect light into shadowed zones without creating unwanted hotspots or glare. The mirror’s size matters—larger surfaces reflect more light, but can be cumbersome to handle. Using adjustable mounts or stands helps fine-tune positioning, turning a simple reflective surface into a versatile lighting tool.
Leveraging Core Features Effectively
So, what makes this mirror approach standalone? Its simplicity and affordability stand out. Unlike high-end diffusion filters or additional softboxes, a mirror requires minimal investment and setup time. Its core feature—the ability to bounce light—relies on basic optics principles but can dramatically improve overall illumination. You might compare this to professional reflectors used in photography, which are designed specifically to manipulate light, yet here, the mirror offers a budget-friendly alternative suitable for content creators.
A Minor Quirk to Consider
One small drawback is that cheaper mirrors can sometimes introduce unwanted reflections or glare if not carefully positioned. Additionally, surfaces with glossy finishes can create hot spots, leading to uneven lighting. Regularly inspecting the mirror’s surface and choosing matte or semi-matte options can mitigate this issue, but it does require a bit of experimentation during setup.
Comparison with Industry Standards
For context, professional lighting accessories like the Neewer Reflector (see spec sheet here) employ high-quality materials designed to maximize light diffusion and reflectivity. The DIY mirror method doesn’t match their precision but offers a surprisingly effective solution for those operating on a budget or in transient setups.
Performance Gets Tested in Real-World Scenarios
When it comes to studio gear, the true measure lies in how equipment withstands demanding situations like filming in challenging conditions or managing high-volume workflows. For instance, lighting kits used during long shooting days must maintain consistent performance without overheating or flickering. Microphones need to handle ambient noise and occasional bumps without losing clarity, while cameras should operate smoothly under various lighting and movement challenges. In one scenario, content creators filming outdoors in rain faced issues with waterproofing, as some gear lacked proper sealing, leading to potential damage. Conversely, high-end rigs with rugged build quality proved resilient, maintaining stable operation and delivering reliable results even under pressure.
Delivering Strength in Extreme Conditions
One area where many products excel is in durability. For example, professional-grade microphones often feature metal casings and water-resistant coatings, making them suitable for outdoor shoots or moving vehicles. Camera models with enhanced heat dissipation systems prevent overheating during prolonged recording sessions, ensuring uninterrupted footage. However, certain affordable models tend to overheat quickly—shutting down or introducing noise—to protect their internal components. This limits their usability for extended projects. Additionally, some lighting equipment struggles with temperature fluctuations, causing color shifts or brightness inconsistencies. The key is whether gear can handle these stresses without compromising quality or risking failure.
Failing When It Counts Most—Where It Falls Short
Despite advances, some gear shows vulnerabilities under pressure. Microphone connectors sometimes become loose after repeated use, leading to intermittent audio. Cameras lacking robust stabilization exhibit shaky footage, especially in dynamic environments. Lighting setups with poor heat management can dim or flicker unexpectedly, disrupting shoot continuity. Furthermore, interfaces or support software often suffer lag or crashes during intensive editing, delaying workflows. These failures highlight crucial weaknesses—like inadequate design for strenuous use—that can be deal-breakers for professionals relying on consistent performance. It’s essential to scrutinize how gear responds not just in ideal conditions but in real, demanding situations.
Community Insights and Verified Claims
Many professional discussion forums, such as Reddit’s r/Filmmakers or Photography答, feature user anecdotes confirming these issues. A Reddit thread highlighted how certain affordable LED panels failed after continuous use, causing delays. Similarly, third-party benchmarks reveal that some microphone preamps distort at higher gain settings—underscoring the importance of testing equipment beyond initial unboxing. Does this align with your experience? Sharing personal stories can help others evaluate gear’s real-world resilience.
Your Turn: Share Your Experience
Have you encountered reliable or problematic situations with your studio or creator gear under pressure? Drop a comment and tell us what held up, what didn’t, and how it affected your workflow. Your insights can help others make informed decisions about equipment that truly performs when it matters most.
” alt=”Professional studio gear set up outdoors in rugged conditions” title=”Durable studio gear handling outdoor stress”/>
Lighting Kits Face Off: Affordable vs. Premium Solutions
When comparing budget-friendly lighting kits like Neewer or Godox to high-end setups such as Aputure or ARRI, the differences become clear. Entry-level options often provide decent brightness and color accuracy but lack advanced features like magnetic modifiers or seamless dimming. Premium brands, however, offer superior build quality, better light diffusion, and richer color rendering, which can justify their higher prices. If you’re just starting out or require portable solutions, cheaper kits might suffice, but for professional work demanding consistency, investing in top-tier options yields better results.
Studio Gear and Creator Rigs: Heavy-Duty Build or Lightweight Flexibility?
Middle-range gear from brands like Elgato or Rode offers solid build quality and ease of setup, ideal for content creators on the go. Conversely, professional rigs from brands like DJI or Sennheiser are constructed with durability and expandability in mind, catering to studios that demand long-term reliability. While budget rigs might be more affordable, they can lack the stability or accessory compatibility of premium models, which can impact your workflow over time. Choosing depends on whether flexibility and durability align with your production needs.
Microphone Reviews: Cost-Efficient Mics or High-End Audio
Entry-level microphones such as Blue Snowball or Audio-Technica ATR2100x give good quality for casual streaming or podcasting, but lack the nuances found in professional-grade mics like Shure SM7B or Sennheiser MKH series. The latter offers better noise rejection, frequency response, and overall clarity, essential for studio recordings or broadcast environments. Budget mics are excellent for beginners, but if pristine audio quality is non-negotiable, investing in high-end microphones delivers clarity that can elevate your content significantly.
Camera Ranges: DSLR Workhorses or Mirrorless Marvels?
Comparing DSLR cameras like Canon EOS 90D with mirrorless options such as Sony Alpha a7 III reveals trade-offs. DSLRs typically have longer battery life and optical viewfinders, advantageous for static shoots. Mirrorless cameras, however, excel with compact design, faster autofocus, and enhanced video features. Both tiers offer quality image output, but professional videographers often lean toward mirrorless for their versatility and size advantage. Budget-friendly models from Canon or Nikon serve well for beginners, yet lack the advanced autofocus and low-light capabilities of premium units.
Is It Worth the Upgrade?
Deciding whether to upgrade depends on your specific needs and budget. For instance, stepping up from entry-level microphones to a professional-grade model can drastically improve audio clarity, but may also require additional investment in accessories like preamps or stands. Similarly, upgrading from basic lighting to a RGB LED panel might enhance creative control but costs more. Always compare current prices—sites like PCPartPicker or Amazon provide comprehensive options. Check out detailed reviews of top brands to determine if the added benefits justify the expense.
In the end, choosing between these options boils down to balancing quality, features, and budget constraints. For in-depth comparisons, it’s worthwhile to explore dedicated reviews and real-world tests to see which gear aligns best with your content creation style.
The Good, The Bad, and The Ugly
- Pros: Cost-effective solution to brighten dark areas, easy to set up, compatible with various lighting setups, can make existing equipment more efficient.
- Cons: Effectiveness highly depends on precise positioning, potential unwanted reflections or glare with cheap mirrors, may require trial and error for optimal results.
Who is This for?
This technique is perfect for small creators, hobbyists, or anyone on a tight budget who wants to amplify existing studio lights without additional costs. It’s ideal for those working in limited spaces or seeking quick improvements. However, skip this if you require professional-grade lighting with consistent brightness, color accuracy, or are managing high-end production environments where standard solutions might fall short.
Final Thoughts: An Easy Win for Budget Shooters
Using a mirror to boost your studio lighting is a straightforward, inexpensive method that can significantly enhance your video quality. It’s a clever hack rooted in basic optics, making it accessible for everyone. While it’s not a substitute for professional lighting rigs, the simplicity and proven effectiveness make it a worthwhile experiment. Save time and money by trying this trick before investing in more complex gear. For more tips, explore our guide on simple accessories that improve your workflow.