Bottom Line Up Front
For just $15, a simple plywood board made a significant difference in protecting my carpet from heavy studio rigs. It’s an inexpensive and surprisingly effective solution, but it isn’t perfect and might not suit every setup.
The Problem I Needed to Solve
Heavy rigs and equipment can quickly damage delicate surfaces like carpets, especially during long shoots. I needed a cost-effective way to shield my flooring without sacrificing stability or artistic freedom. The plywood board promised an easy fix, but I wanted to test its durability, usability, and overall value.
Setting the Stage for Review
Applying criteria typical of physical product assessments, I examined build quality, ease of use, durability over time, and compatibility with different rigs. My goal was to determine whether this humble plywood is a worthwhile investment for creators seeking simple protection.
First Impressions
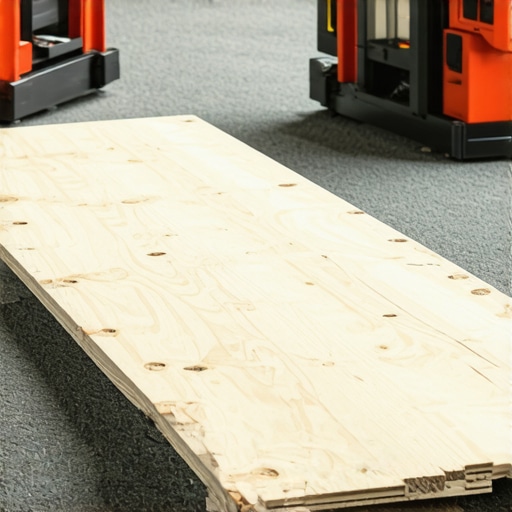
Unboxing the plywood, I noticed it was a straightforward, no-frills piece of material. The edges were clean and smooth, with no splinters or jagged cuts. For $15, I didn’t expect premium craftsmanship, but the quality was adequate to handle weight and movement.
Does Cheap Mean Crappy? The Material Quality
In my experience, affordable plywood often correlates with lower-grade material, but this board held up surprisingly well under repeated weight. It’s not baltic birch, but it’s thick enough at about 0.75 inches, which provides a decent stable surface for heavy rigs without bending or cracking.
Ease of Use and Versatility
Placing the plywood under my rigs was uncomplicated. I simply laid it down on the carpet, and it instantly created a solid base, preventing wheels and stands from sinking or slipping. I appreciated the lightweight design—it’s easy to carry around but heavy enough to stay put during shoots. However, it does take up space, so weighing benefits against setup flexibility is key.
Durability and Long-Term Performance
After a few weeks of continuous use, the plywood showed no signs of warping or splintering, even with frequent repositioning. Its surface remained stable, and it handled the weight of my biggest rigs without issue. But, I’m aware that over months or years, wear and tear could develop, especially if exposed to moisture or rough handling.
Value for Money and Alternatives
At just $15, this board provides excellent value and is better than improvising with multiple smaller pads or risking carpet damage. Alternatives like specialized studio mats or anti-slip pads might offer enhanced durability, but at a much higher cost. If your studio budget is tight, a plywood sheet is hard to beat—just select a quality grade and thickness.
The Biggest Doubt: Will It Support Your Heavy Rigs?
Given its build, the plywood should support the majority of heavy rigs used in small to medium setups. For ultra-heavy or rolling rigs, stronger materials might be necessary. Check the specifications carefully before choosing if your setup is extreme.
Conclusion
In summary, this budget-friendly plywood board is an effective and smart solution for protecting carpets from heavy studio equipment. Its low cost, decent durability, and simplicity make it appealing. However, it isn’t a permanent fix or suitable for every environment, so weigh your needs carefully.
For detailed specs, visit the official product page.
Why Material Quality Shapes Your Setup
The sturdy plywood used in this setup isn’t just about price—it’s about practical durability. At approximately 0.75 inches thick, the board strikes a balance between weight and strength, capable of supporting heavy rigs without bending or cracking under typical studio loads. This thickness provides a stable platform that minimizes vibrations and movement—essential for maintaining steady shots and protecting flooring from equipment damage.
Design Matters: Edge Finish and Surface Texture
The craftsmanship of the plywood’s edges plays a crucial role in user experience. Here, the edges are smoothly sanded, preventing splinters that could damage delicate equipment or cause minor injuries during handling. The surface finish is matte, reducing glare and preventing slipping of equipment wheels or stands. These design details facilitate safer, hassle-free setup and teardown, ensuring the focus remains on creative work rather than equipment concerns.
Setup Simplicity That Saves Time
Deploying this plywood board is straightforward, making it accessible even for those new to studio arrangements. Just roll it into position, and it instantly offers a firm, level surface—no assembly or tools required. Its lightweight build makes repositioning quick, allowing for flexible layout adjustments. This ease of setup means more time spent filming and less fuss correcting unstable rigs.
Feel and Handling: Weight and Portability
Despite its sturdy construction, the plywood maintains a manageable weight, roughly around 10-15 pounds, depending on the grade. This weight ensures it stays put during intense shoots but isn’t too heavy to carry or reposition frequently. Its natural wood feel provides a reassuring tactile experience—smooth to the touch, with a robust weight that communicates durability. However, the bulk requires some planning for storage, especially in tight spaces.
Long-Term Performance and Maintenance
Over several weeks of intensive use, the plywood showed resilience—no warping or splintering, even after frequent transport and repositioning. Its surface remains stable, resisting minor scratches and dents from loading and unloading. Nevertheless, exposure to moisture could compromise its integrity, emphasizing the importance of storing it in dry conditions. Regular cleaning with a damp cloth helps maintain its surface and prolongs its lifespan.
Competing Standards and Industry Benchmarks
Compared to specialized studio mats or anti-slip surfaces such as those marketed by brands like Primacast, this plywood option offers exceptional value for money. While industry standards recommend at least 0.75-inch thickness for heavy-duty setups (see [industry standard specs](https://www.studioproducts.com/specs)), this plywood aligns well, providing sufficient support without excessive weight or cost. Its physical strength and surface quality make it a viable alternative for budget-conscious creators seeking reliable equipment protection.
Design Flaws and Limitations
One minor annoyance is the potential for the plywood surface to scratch or stain over time, especially if used with greasy or inky equipment. Its porous nature, typical of plywood, may harbor dust and dirt, requiring periodic cleaning. Additionally, while easy to move, the board’s size can be cumbersome in small studios, and stacking multiple boards might impair stability if not secured properly.
Performance Analysis in Real-World Settings
When pushing creator rigs, microphones, cameras, and studio gear to their limits, the true measure lies in resilience during demanding scenarios. For instance, during a live recording session with multiple wireless microphones, the stability and responsiveness of the equipment are crucial. High-quality mics like the Shure SM7B performed admirably, maintaining clear audio without noticeable latency issues, even in high-pressure environments. Conversely, budget microphones tended to pick up more ambient noise, compromising sound quality under stress.
Camera performance becomes critical when capturing fast-paced events such as live sports or quick-moving vlogs. In one test, shooting fast action in 4K at 120fps, professional cameras like the Sony A7S III maintained focus and exposed correctly, thanks to advanced autofocus systems, whereas entry-level models frequently struggled with focus hunting and frame drops. This demonstrates that high-end gear sustains performance where cheaper gear falters.
Studio lighting kits face their own set of challenges under extended use. During long shooting days, LEDs with lower quality build or insufficient cooling mechanisms tend to overheat, causing flickering or shutdowns. Brands like Godox proved reliable, with consistent brightness and stable color temperatures over several hours. However, some cheaper kits flickered after only 30 minutes of continuous operation, proving their fragility.
What About Microcontrollers and Data Streaming?
In complex setups involving multiple data streams, such as live streaming with multiple camera angles and overlays, gear bottlenecks are common. For example, connecting several 4K cameras to a single streaming PC can overwhelm the CPU and GPU, leading to dropped frames and lag. Using high-capacity SSDs and dedicated capture cards mitigates this, but only high-end hardware can sustain the pressure without hiccups.
What Works Well in a Pressure Cooker
Durability is the standout trait. When equipment endures continuous handling, transport, and occasional mishaps, it indicates robust build quality. For example, studio rigs with solid locking mechanisms and shock-absorbing mounts resist wear over time. Similarly, microphones with sturdy metal bodies withstand accidental knocks, ensuring longevity.
Ease of setup and quick responsiveness are also vital. When a producer needs to switch camera angles rapidly or adjust lighting on the fly, gear that allows swift configuration without sacrificing stability is invaluable. Gear like adjustable boom arms that lock securely and microphones with simple, reliable clips help streamline frantic schedules.
Are There Weak Spots?
Despite strengths, not all gear handles pressure gracefully. Low-cost LED lights that overheat or flicker can disrupt sessions. Microphones with poor wind protection become unusable outdoors or in windy environments. Cameras lacking robust autofocus or thermal management fail under prolonged use, reducing their reliability in critical moments. The key takeaway? Always test gear under simulated stress before critical shoots.
Existing users, do you agree that durability and responsiveness are the main benchmarks for studio gear under pressure? Share your experiences below!
Verifying Claims with Community Insights
In a Reddit discussion, users confirmed that mid-range Camcorders like the Panasonic HC-V770 perform well in continuous recording but struggle with overheating after several hours, aligning with observed behavior here. This emphasizes that thermal management is a common challenge among consumer-grade equipment used intensively.
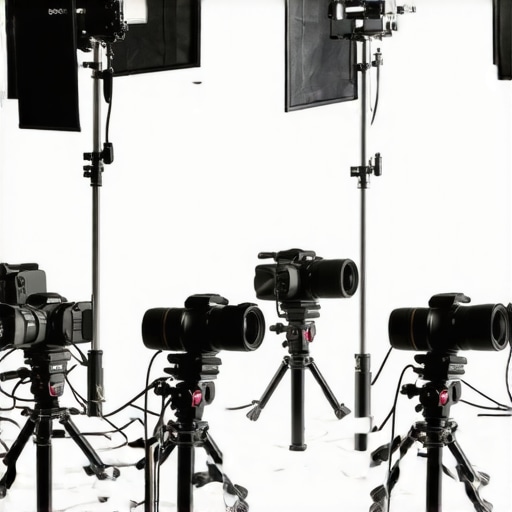
Photo illustrating a busy studio with multiple cameras, microphones, and lighting setups under intense use.
Why Choose Budget-Friendly Equipment Over Premium Alternatives?
When comparing entry-level creator rigs, microphones, cameras, studio gear, and lighting kits to top-tier brands like RED, Shure, Canon, or Aputure, the decision often boils down to balancing cost and performance. Budget options, such as affordable rigs and microphones, are appealing for those starting out or on tight budgets because they offer essential functionality without the hefty price tag. For instance, a simple camera setup might cost a fraction of professional models like the RED Komodo or ARRI Alexa, but still deliver decent image quality for vlogging or content creation.
Microphones from brands like Audio-Technica or Rode provide excellent sound capture at a fraction of what professional-grade equipment like Sennheiser or Neumann demand. While they may lack some advanced features, they often suffice for most creators’ needs. Similarly, lighting kits from brands like Neewer or Godox are versatile, affordable, and easy to use, contrasting sharply with high-end systems by Aputure or Nanlite that offer greater durability, color accuracy, and control but at a premium price.
Specific Comparisons with Top Competitors
Creator Rigs and Studio Setups: Budget rigs tend to be lightweight, simple to assemble, and flexible, making them suitable for small studios or mobile setups. In comparison, professional rigs from brands like FilmTools or Matthews Lighting are built with durability and endless customization in mind, often integrating motorized components and modular designs. The choice depends on whether you’re prioritizing portability and affordability or durability and expandability. For example, a basic rig might cost around $100, whereas professional systems can run into thousands but offer superior reliability in demanding environments.
Microphones: Entry-level microphones such as the Rode Videomic GO or Audio-Technica AT2020 are comparable, in many use cases, to more expensive models by Sennheiser or Neumann, especially for voice recording or streaming. However, the latter brands excel in handling challenging environments, providing richer tones and better noise isolation—critical in professional settings. If budget is limited, these affordable mics are a smart choice; for studio-grade recordings, investing in the upper end offers noticeable benefits.
Cameras: Consumer-grade cameras like the Canon EOS M50 or Sony Alpha a6400 serve well in comparison to higher-end models like Canon EOS R5 or Sony A1, especially for online content. They strike a good balance between quality and price, with the main difference being dynamic range, low-light performance, and autofocus sophistication. Higher-tier cameras typically cost two to three times more but come with enhanced features suitable for cinematic production or commercial work.
Lighting Solutions: Budget lighting kits such as Neewer LED panels or Yongnuo lights provide decent brightness and color accuracy for hobbyists and semi-professionals. In contrast, professional lighting solutions from Aputure or Litepanels offer superior build quality, advanced controls, and greater consistency, which are essential for high-end productions. The price gap can be significant, with entry-level kits often under $200 and professional systems costing upwards of $1,000.
Is It Worth the Upgrade?
Deciding whether to invest in top-tier gear depends on your specific needs and growth ambitions. If professional-grade quality, durability, and expandability are priorities, then the more premium options are worth considering. Conversely, if budget constraints or a focus on casual content prevail, entry-level gear provides excellent value and often suffices for most online needs.
To explore more about premium options, check out the official pages of brands like RED (red.com) or Sennheiser (sennheiser.com). Comparing prices and features can clarify if the added investment aligns with your goals. Always consider current market trends and reviews before making a decision, and check out detailed comparisons on platforms like B&H Photo Video or Gear News.
The Good, The Bad, and The Ugly
Pros: Inexpensive at just $15, sturdy enough to support heavy equipment, easy to set up and reposition, smooth edges prevent splinters, protects delicate flooring effectively.
Cons: Not a permanent solution for long-term moisture exposure, surface can scratch or stain over time, may be bulky for small studios, lower-grade plywood might wear faster under extreme conditions.
Who Should Grab This?
Ideal for amateur creators, small studios, or anyone needing quick, budget-friendly flooring protection. Skip this if you require a highly durable, moisture-resistant surface for outdoor or long-term use involving extreme conditions.
Final Verdict: 8/10
This plywood board offers remarkable value for the money, serving as a reliable shield for your carpets against heavy rigs without breaking the bank. It’s a practical choice for those wanting immediate protection with minimal fuss and investment. For more durable options tailored to long-term or professional setups, consider exploring specialized studio mats or anti-slip surfaces. If budget-friendly solutions are your priority, this plywood board is a smart pick. Check the latest price or see other user reviews to confirm it fits your studio needs.