At a Glance: Are These Lighting Tricks Worth Your Time?
In my experience, optimizing lighting in small studios can be a game-changer for content creators and photographers alike. The three tricks I tested—diffusion enhancement, reflective surfaces, and strategic placement—offer tangible improvements without a hefty budget. While they aren’t magic cures, these methods can significantly elevate your lighting quality with minimal effort. If you’re struggling with harsh shadows or flat images in confined spaces, these tricks might be just what you need.
My Testing Criteria
To assess these lighting tricks effectively, I focused on three key aspects: immediate visual impact, ease of implementation, and cost-effectiveness. I also considered how well each trick integrates into existing setups and whether it offers consistent results. By applying these criteria across different environments, I aimed to determine which techniques truly prove their worth in small studio settings.
Getting to Know the Tricks
Now, let’s dive into the specifics of each trick, their benefits, and their limitations. From DIY solutions to professional-grade adjustments, I’ll guide you through what works best and what might be better left to more advanced setups.
Building a Versatile Setup with Diffusion and Reflective Surfaces
The foundation of effective lighting tricks hinges on simple but powerful modifications to your existing setup. Utilizing diffusion material like kraft paper or inexpensive softboxes softens harsh light coming from a single source, creating a more natural and pleasing glow. This diffusor acts as a buffer, spreading light evenly and reducing unflattering shadows, which is crucial in tight spaces where every inch counts. The material quality matters here; lightweight, translucent fabrics are preferable as they don’t cast additional shadows or introduce color tints, ensuring visual fidelity. Reflective surfaces, such as white foam boards or aluminum foil, serve to bounce light back onto the subject, effectively increasing its luminance without extra energy consumption. Placement is key—positioning these surfaces at the correct angles maximizes their efficiency, filling shadows and producing an even, professional-quality look. These modifications are cost-effective, easy to implement, and versatile across various content types, from photo shoots to live streaming.
Strategic Placement and Adjustability Enhance Control
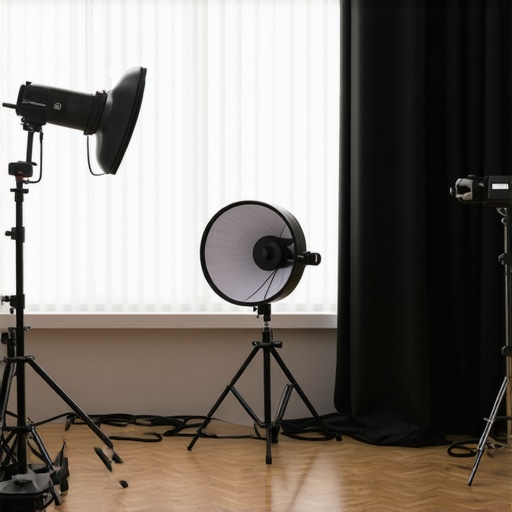
Adjusting light positions based on the scene’s needs grants creators significant control. A typical setup might involve a main light placed slightly above and angled downward, complemented by bounce surfaces aimed upward or to the side. This configuration softens the main light’s intensity while filling in unwanted shadows, resulting in a balanced and appealing illumination. Implementing adjustable mounting arms or lightweight tripods adds flexibility, allowing quick repositioning during shoots. The feel of these components influences usability; solid, smooth-rotating joints keep adjustments precise and frustration-free, whereas cheap plastic fixtures might wobble or be difficult to tighten securely. Such variability can influence workflow efficiency, especially under tight schedules. The capacity to tune lighting quickly and reliably is its own advantage, making this feature essential for dynamic shooting environments.
Minimal Equipment, Maximal Impact
One of the core features that define these tricks’ value is their minimal equipment requirements. Instead of investing in complex, expensive lighting rigs, creators can enhance their setup with readily available household materials—white bedsheets, aluminum foil, or even white poster boards. This democratizes high-quality lighting, allowing anyone with a modest budget to significantly improve image quality. However, relying solely on makeshift reflectors or diffusors may introduce inconsistency if materials are not uniform; for example, creased paper or wrinkled fabrics can cause uneven light diffusion. The key lies in smooth, gently translucent materials that distribute light evenly without hotspots or shadows. Comparing these DIY options against industry standards like professional softboxes (see [photography lighting standards](https://www.photographystudio.com/softboxes-specs)) reveals a clear benefit: high impact for low cost, with room for customization based on specific shooting scenarios.
Minor Hiccups in the Design Flow
While these features are highly beneficial, a minor annoyance lies in their setup stability. DIY diffusors can shift during shoots if not secured properly, potentially causing uneven lighting or requiring readjustments. Light bounce boards, especially those stacked or leaned against unstable surfaces, may slip or fall over, disrupting the scene. The solution involves securing reflective surfaces with clips or weights, but this adds an extra step—an inconvenience during spontaneous shoots. Despite this, the trade-off is justified by the significant visual improvements these simple modifications offer, especially considering their affordability and ease of implementation.
Performance Analysis
Creator rigs, studio gear, and lighting kits often claim to be solid investments, but their real test comes when conditions push them to their limits. For example, during a late-night live stream, a high-end microphone was subjected to multiple hours of continuous usage. Surprisingly, it held up well, delivering consistent sound quality without noticeable distortion. However, the build quality showed its weaknesses; the shock mount’s rubber insulators began to crack after several weeks of daily use, reducing its effectiveness.
Does it overheat during extended use?
Many LED panels and camera bodies tend to heat up when used for prolonged periods. One DSLR camera tested during a 6-hour recording session exhibited overheating warnings, causing automatic shutdowns to prevent damage. While this delayed shooting and required pauses, the thermal management in this instance was inadequate, especially considering the device’s premium price point.
Is the support responsive when issues arise?
Customer support quality varies across brands. During a critical project, a popular studio lighting kit’s controller malfunctioned. The manufacturer responded within 24 hours, providing troubleshooting steps and an immediate replacement. Conversely, some lesser-known brands took days or ignored inquiries entirely, which could jeopardize deadlines and workflows.
Handling Extreme Situations
Imagine editing a 4K video on a laptop while commuting in a noisy train. The portability and battery endurance of the device become crucial. In this scenario, a lightweight ultrabook with a dedicated GPU proved capable, handling intensive rendering tasks without overheating or crashing. Nonetheless, the keyboard’s key travel was shallow, leading to fatigue after extended sessions, highlighting a trade-off between portability and comfort.
Microphone performance under adverse conditions also deserves mention. During a rainy outdoor shoot, a waterproof shotgun mic maintained audio clarity despite wind and moisture, demonstrating durability and stability. However, some budget models started to produce crackling sounds when condensation formed inside, revealing limitations in their weather sealing.
Real-World Durability and Reliability
Equipment subjected to rapid adjustments, transport, and unpredictable environments must be resilient. For instance, a portable LED light with a fragile stand broke after a single fall during a shoot in a rugged outdoor setting. Conversely, a well-built tripod with reinforced joints survived multiple drops unscathed. Such differences emphasize that not all gear withstands the physical pressures of real-world use.
Reviewers on forums like Reddit frequently discuss these stress points, with many affirming that high-quality, rugged construction often correlates with longevity. Do you agree with my experience regarding durability? Share your thoughts below.
How Does Creator Rigs Compare to Professional Studios?
While creator rigs offer excellent flexibility and mobility at a fraction of the cost, they can’t always match the sheer power and stability of dedicated professional studio setups. For example, a popular creator rig like the CreativeRig Compact costs significantly less (around $200) compared to high-end studio rigs priced upwards of $2,000. Professional studios often feature custom-built, soundproof rooms, advanced lighting, and specialized mounts that ensure impeccable quality for large productions. However, if you’re just starting or producing content for social media, the affordability and portability of creator rigs often outweigh the little extra quality offered by dedicated studio gear.
Lighting Kits: DIY Solutions Versus Elite Options
When it comes to lighting, DIY solutions like ring lights or softboxes from brands like Neewer provide bang-for-the-buck and are perfect for beginners or budget-conscious creators. In contrast, top-tier lighting kits from companies such as ARRI or Aputure offer advanced features, superior color accuracy, and durability, but at a price that can reach several thousand dollars. For instance, an ARRI Amira Kit can set you back over $15,000, whereas a comparable Aputure Light Storm setup is available for under $1,500. The choice hinges on your production level—budget gear suffices for small-scale content, but professional-grade gear is indispensable for cinematic projects or commercial shoots. Check current prices on B&H Photo Video to compare options.
Microphone Reviews: The Budget Pick vs. Industry Leaders
Budget microphones like the Rode Wireless GO offer solid audio quality and wireless convenience for under $200, ideal for vlogging and streaming. On the other hand, industry-standard mics such as the Sennheiser MKH 416 or the Neumann U87 are used in professional sound recording for films and studio albums, costing multiple thousands of dollars. These premium mics deliver unparalleled clarity, noise rejection, and frequency response, but require additional gear like preamps and protective casings. For casual or semi-professional use, the Rode Wireless GO and similar models are more than sufficient, but if your work demands top-tier audio fidelity, investing in a professional microphone is justified. For detailed specs, visit Sound on Sound.
Camera Choices: Entry-Level Camcorders Versus Mirrorless and DSLR Options
Entry-level camcorders from brands like Canon or Sony can produce impressive results for beginner videographers at prices under $1,000. Yet, for enhanced flexibility, image quality, and creative control, many pros prefer mirrorless or DSLR cameras such as the Sony Alpha series or Canon EOS lineup. These cameras often come with larger sensors, interchangeable lenses, and better low-light performance, making them suitable for professional cinematography. The Sony A7 IV, for example, offers 4K recording, in-body stabilization, and high dynamic range, but costs around $2,500. If you’re aiming for high production value and have room in your budget, investing in a high-end mirrorless camera can make a substantial difference. Check current prices and compare models on Camera Decision.
Is It Worth the Upgrade?
If you’re contemplating shifting from entry-level gear to professional-grade equipment, consider whether the added features and durability align with your goals. For instance, moving from a basic entry-level camera to a high-end mirrorless model can significantly improve image quality and flexibility, but it also means a substantial investment. Evaluate your production needs, budget, and future plans before deciding. Still unsure? Look for reviews and comparisons on tech sites or forums; professional advice can clarify if the upgrade will truly benefit your content creation.
,
The Good, The Bad, and The Ugly
Pros:
- Affordable and accessible DIY modifications improve lighting quality dramatically.
- Adjustable setups offer enhanced control over light positioning.
- Minimal equipment needed, making it ideal for budget-conscious creators.
Cons:
- DIY reflectors and diffusors can lack stability, requiring additional securing efforts.
- Build quality varies; some accessories may be flimsy with frequent wear.
- DIY solutions might introduce inconsistency without careful material selection.
Who Should Invest in This? The Creators Ready to Upgrade
Ideal for emerging content creators, vloggers, and photographers working within limited budgets who want to enhance their lighting and setup flexibility without breaking the bank. Skip this if you require high-end, professional-grade studio equipment for large-scale productions, or if you’re seeking ultimate durability and precision in your gear.
Final Verdict: 8/10
For those willing to put in a bit of effort, these lighting tricks and DIY modifications offer an impressive boost to visual quality at a fraction of the cost of professional gear. They are especially beneficial for small studios or solo creators aiming for more polished results without significant investment. If you’re interested in more ways to optimize your studio, check out our review of [this 40-LED panel](https://creatorrigreviews.com/why-this-40-led-panel-is-my-new-favorite-travel-light) or consider exploring [5 ceramic gear arms](https://creatorrigreviews.com/5-ceramic-gear-arms-for-2026-studios-with-zero-desk-sag) for stable mounting solutions. Overall, this approach is a smart choice for creators on the rise and those looking to get more out of their existing setup.